www.beezar.com

|
Step 24. - The final step for the PCB is the wiring, of which there is very little. This consists of the ground wire for the Alps pot, and the safety ground for the PCB. The pot ground wire is straightforward. Unfortunately, I should tell you that it would be much easier to do right after you install the pot to the PCB and before you install the OTs. Nevertheless, there is just enough room - with the right screwdriver - to install the ground wire at this point in the build sequence. Cut a wire slightly longer than the distance from the PCB to the top pot screw as shown. After soldering the wire into the PCB and unscrewing the pot screw, loop the other stripped end of the wire around the pot screw shaft and screw the screw back into the pot:
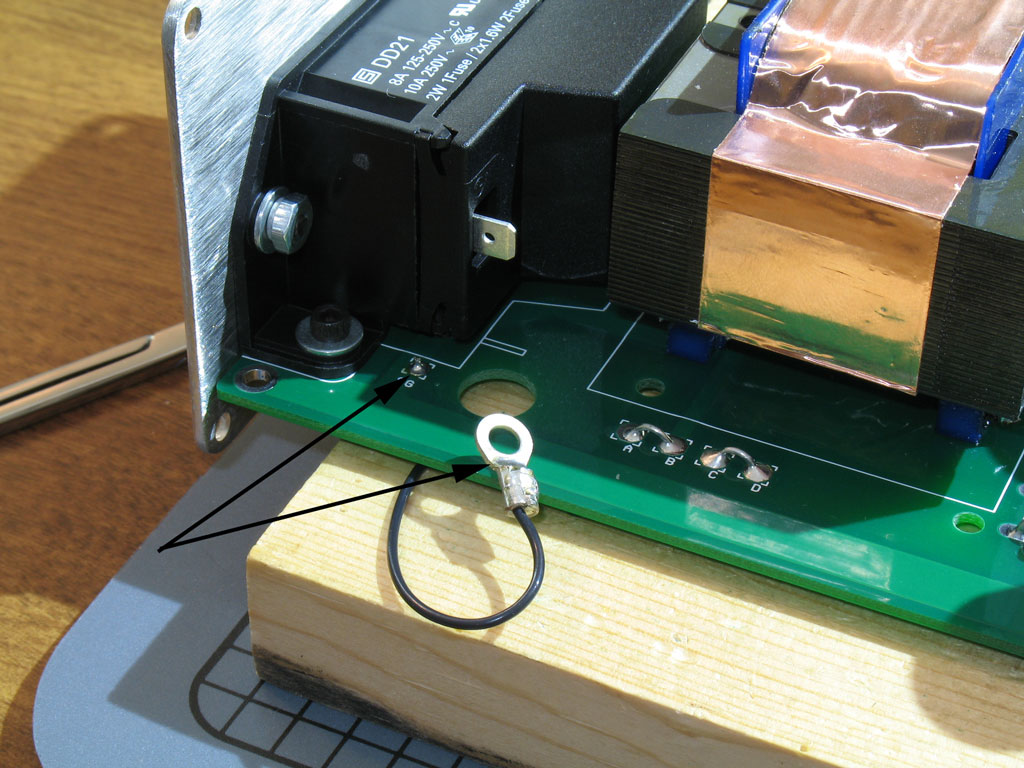
Step 25. - Next, install the safety ground wire at the back of the PCB. To do this, cut and strip both ends of a wire about 2 inches long. You can probably get away with it being much shorter, but there's no issue with looping it under the PCB and it's a lot easier to have a wire that's too long rather than one that's too short. On one end of the wire, solder a lug for a 4-40 screw as shown. You can use a crimp-style lug, but since this is for "safety," please solder it, too. Once you have that done, solder the other end of the wire by placing it into the pad on the bottom of the PCB. The large hole in the PCB will allow us room for a screwdriver from above:
HEY!! We've finished the PCB!! |

file last changed:Friday, December 30, 2011 6:00:00 AM
Please contact the TORPEDO webmaster for questions about these web pages.