www.beezar.com

|
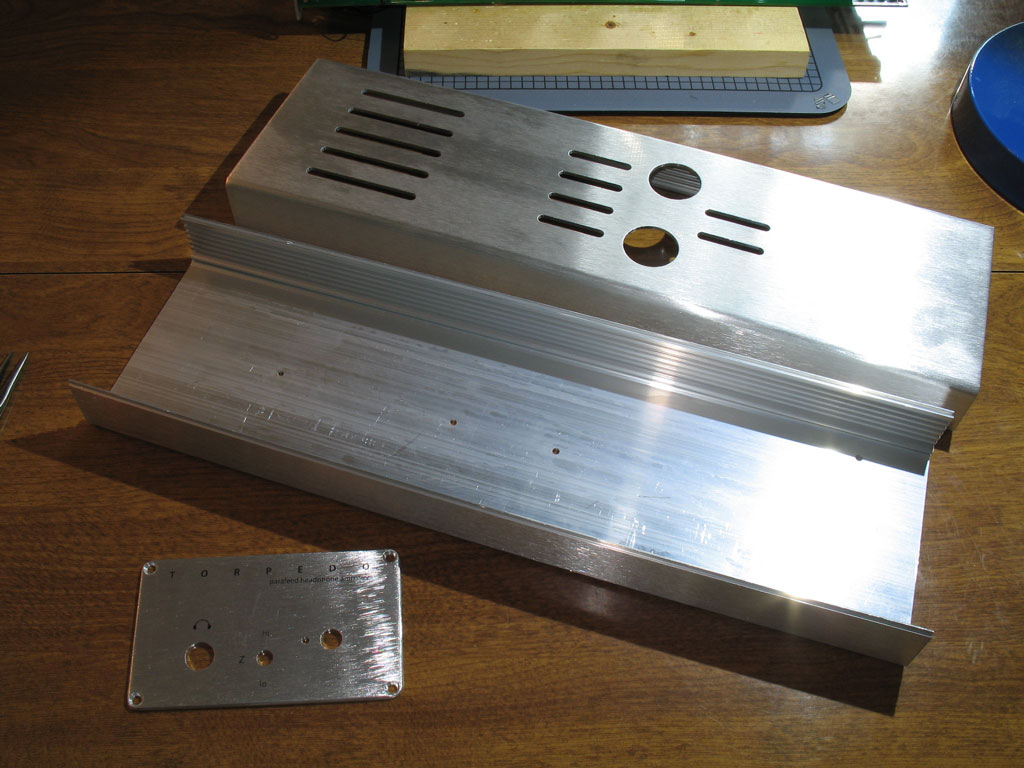
Step 27. - Final Assembly! Below we see the custom Beezar/ECP Audio case from Context Engineering. The case comes in two equal halves. This was a primary design selection for the Torpedo. That's because the transformers and other part heights require that the case depth is enough that the tubes barely stick out of the top. IOW, you can plug a pair of tubes into the amp while it's cased up, but getting them out is a different story. With the Context case design, however, you can simply unscrew the top two screws of each end plate and simply lift off the top of the case. Right now, the custom cases are bare-unfinished aluminum. That may change if the amp is a great success with you guys, but in the meantime, it means more cleaning. Unfortunately, I am not happy with the finish condition in which Context supplied the machined cases. The reason being is that there are metal chips and dust everywhere. As with the PCB above, this is HIGH VOLTAGE and the last thing you want around HIGH VOLTAGE are a bunch of conductive metal chips and dust. So please-please-please, for your own safety, clean these things thoroughly. I took a small screwdriver with a paper towel folded around its tip and ran it the length of every slot - including the slots that are used to fit the top and bottom case halves. In addition after that, I gave the insides a thorough wipe-down and finished by running paper towel/rag around the inside of every machined hole.
The first thing we need to do after cleaning the case parts is to install the standoffs onto the PCB. Note in the pic above that there are four 4-40 size (1/8") holes. The one close to the corner in the back is for the safety ground. The other three, along the centerline of the case, are for the standoffs. Please do not omit these. The PCB is quite long and as you have already noticed, there is considerable weight on the ends. The tubes are more or less in the middle, so support toward the middle, especially for the tubes, is very important. That said, there's no great complication to the standoffs. I mixed up what I had with enough washers to cover the gap. My one trick is to install the lockwasher on the screw side (top surface of PCB). This helps to ensure that the screwed connection on the inside of the case comes loose last. The PCB also has a slight curvature (down) width-wise, so you want enough of a standoff to provide some force onto the bottom of the case. Turned over right-side up, it should be very difficult to slide the PCB with standoffs into the case because of the standoffs scraping along the case bottom. Upside down, the standoffs should be just barely clearing with some scraping. In my case, it took several washers with the smallest standoffs I had on hand. I'll make certain to specify the best combination in the website's BOM, though.
Shown at top is also the safety ground hole. Once you get the standoffs installed on the PCB, slide the PCB assembly into the bottom of the case. Note that we're in the 2nd slot from bottom (not counting the end plate mounting holes slots). Slide the PCB in until the back plate (still attached to the PCB) is against the case body. Don't screw the back plate in at this point, though. You should screw in the safety ground, first. That way, you can shift the PCB back and forth as needed until you get the safety ground installed. I used a 3/8" 4-40 cap screw with a washer and lock washer on the inside. It's threaded through the safety ground lug and through the hole in the bottom of the case. On the outside bottom of the case, finish off the screw with a flat washer and nut. Once you have the safety ground securely attached to the bottom of the case, install the screws into the standoffs and the back plate. Here we see the case bottom with all of the screws in place (and the two bottom screws of the back plate attached):
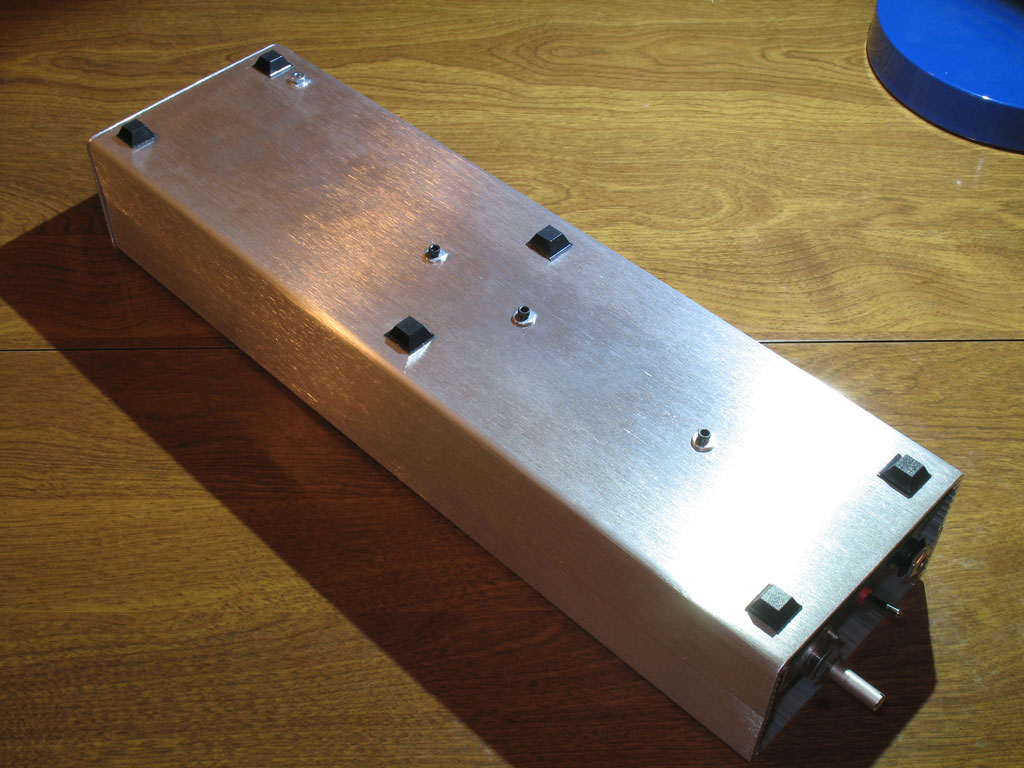
Next the amp doesn't sit so well on those standoff screws and safety ground nut, so I installed the rubber feet. Because the case is so long, I used six instead of four - it just felt right:
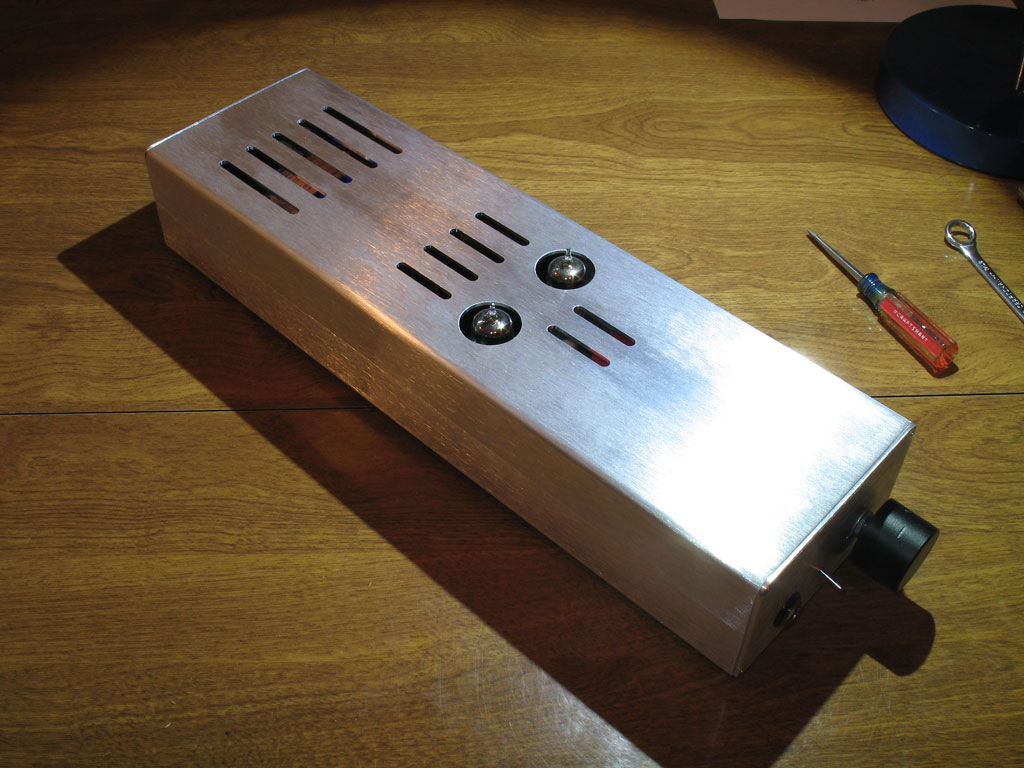
Last, install the front plate by lining up the plate holes with the pot shaft and the headphone jack. Be certain that the headphone jack tube fits into the end plate hole and be sure the pot locating pin is also positioned correctly. Finger-tighten the the nuts to both. Install the bottom two screws of the front plate and go back and tighten down the headphone jack nut and the pot nut. Finally, install the tubes (don't forget those), place the case lid on top, being careful to seat the top properly into the case bottom's mating-up slots. Install the top screws for both end plates. Install the volume knob. (You may want to trim the shaft - more on that later.) Here we see the front plate finished and installed:
And we're finished building the Torpedo!!
|


file last changed:Friday, December 30, 2011 6:00:00 AM
Please contact the TORPEDO webmaster for questions about these web pages.