Buy Boards & Parts:
www.beezar.com
www.beezar.com

The Millett Hybrid MiniMAX - Construction
Construction > Drawings & Templates > Lansing CT1 Manual
Drawings & Templates - Lansing CT1
 |
| ||||||||||||||||
|
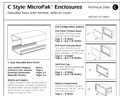
The Millett Hybrid MiniMAX is designed to be used with the Lansing MicroPak series enclosures, specifically, the CT1 or DT1. The MiniMAX Team has specifically designed the DT1 case for custom machining and silkscreening from Lansing. Refer to the DT1 page for details. It is possible, however, to manually construct either the Lansing CT1 or DT1 case with conventional drilling. Below are drawings and templates to assist you in installing a populated MiniMAX PCB into the Lansing CT1 case. With some modification it is possible to use these templates for the DT1 case as well, but we recommend that you simply purchase the custom MiniMAX DT1 case, instead. Remember that the 1" height restriction applies for either choice: CT1 or DT1 case. |
|||||||||||||||||
| Note: Make certain the board is supported through the center hole and the bottom of the case center hole. Use a 3/16 standoff, spacer, washers or combination of all three (as long as they total up to that length). The screw size is 4-40 and should be about ½ long or longer to allow for a washer, lock washer and nut on top of the board. The screw head should be underneath the case. Do not attempt to plug tubes in or out without this screw and standoff/spacer in place. | |||||||||||||||||
|
| |||||||||||||||||
 |
| ||||||||||||||||
|
NOTE: The PDF files are probably the best to use in printing out drilling templates for the MiniMAX. However, with the
multitude of printers that exist, it is impossible to guarantee that the templates will print to scale in every case.
The graphic scales are included to assist in this task, however. Adjust your printing scale until the graphic scales
are the correct size.
| |||||||||||||||||
 |
| ||||||||||||||||
|
NOTE: While not shown, cooling holes should be provided on the case bottom. An amount equal to or greater than the cross-sectional area of the holes on top should be provided on the bottom. For instance, the drawings show 34 - 3/16" holes for approx. 1 sq.in. cross-sectional area. Additional area exists in the clearance between the tubes and the tube holes, plus a small amount from the trimmer adjustment holes. The equivalent might be on the order of 24 - 1/4" holes on the bottom. Larger holes would require a fewer number. Location is not as critical as on top. However, since cooling holes are now provided in the MiniMAX PCB, locating the bulk of the bottom holes beneath those PCB cooling holes will be advantageous.
| |||||||||||||||||
|
Additional Info
|
|||||||||||||||||
| |||||||||||||||||