|
|
The Mute Audio GrubDAC
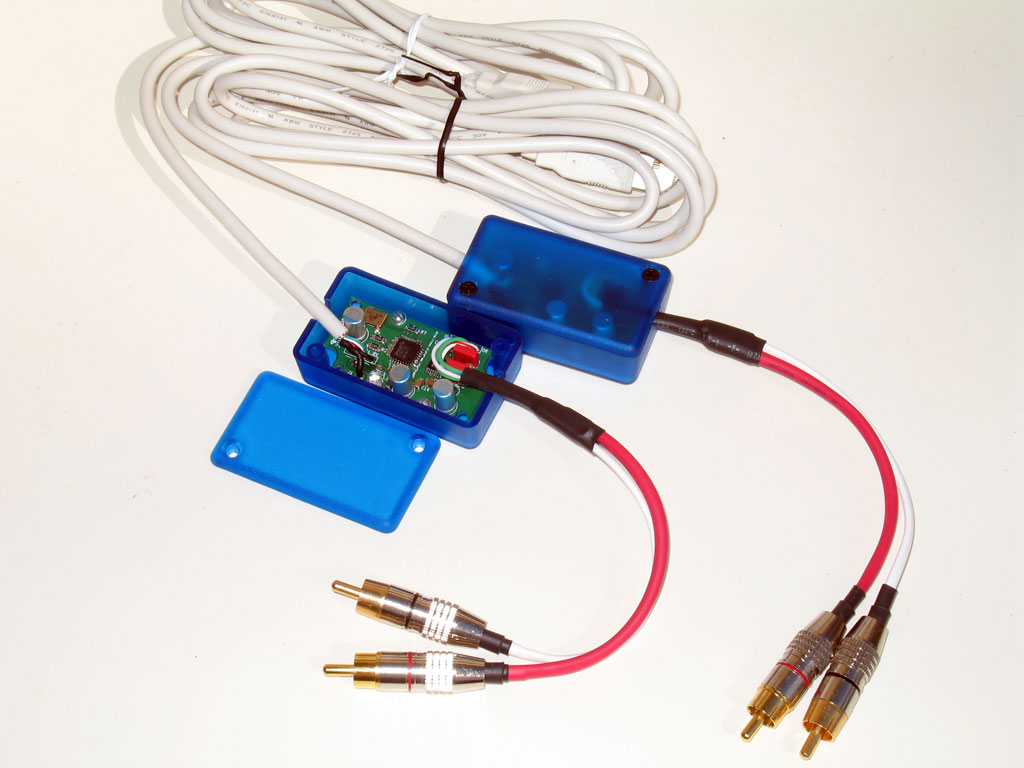
GrubCableDAC
| The GrubCableDAC is a variation on building the GrubDAC. Essentially, the USB Mini-jack is left unpopulated. The selected case, Hammond Mfg #1551HTBU, is very small - 2.126 (54mm) x 1.142 (29mm) x 0.63 (16mm) inside dimensions - and light. This allows one to wire the case directly into the ends of a USB cable and to terminate the other side with standard leads and RCA jacks. In one fell swoop, you've eliminated any |
 |
| plug-in connection to the GrubDAC board, and eliminated any patch cords in connecting the GrubDAC to an amp.
How to Construct:
1. Populate a GrubDAC board minus the Mini-USB connector.
2. Solder the USB pigtail cable to the grubDAC as shown below.
3. Make up the RCA leads and plugs, solder to the grubDAC's output pads.
4. Cut/grind a small channel in each end of the Hammond case, sized for the USB pigtail and the RCA output leads (3/16" - 1/4" should suffice).
5. Install the grubDAC and its USB Cable and output leads to the Hammond case with two small #2 self-tapping screws (provided with Beezar kits).
6. Assemble the case with the two #4 phillips screws as provided.
|
| Details follow below - |
Wiring the USB cable into the board is a piece of cake. USB wiring is an international standard - all wiring positions are defined down to the color:
Note that the GrubDAC board has a series of USB input pads - above the USB mini-connector - that are the same as the diagram for "A". Here is an easy reference on a web page that you can print out for your convenience:
USB pins and color codes |
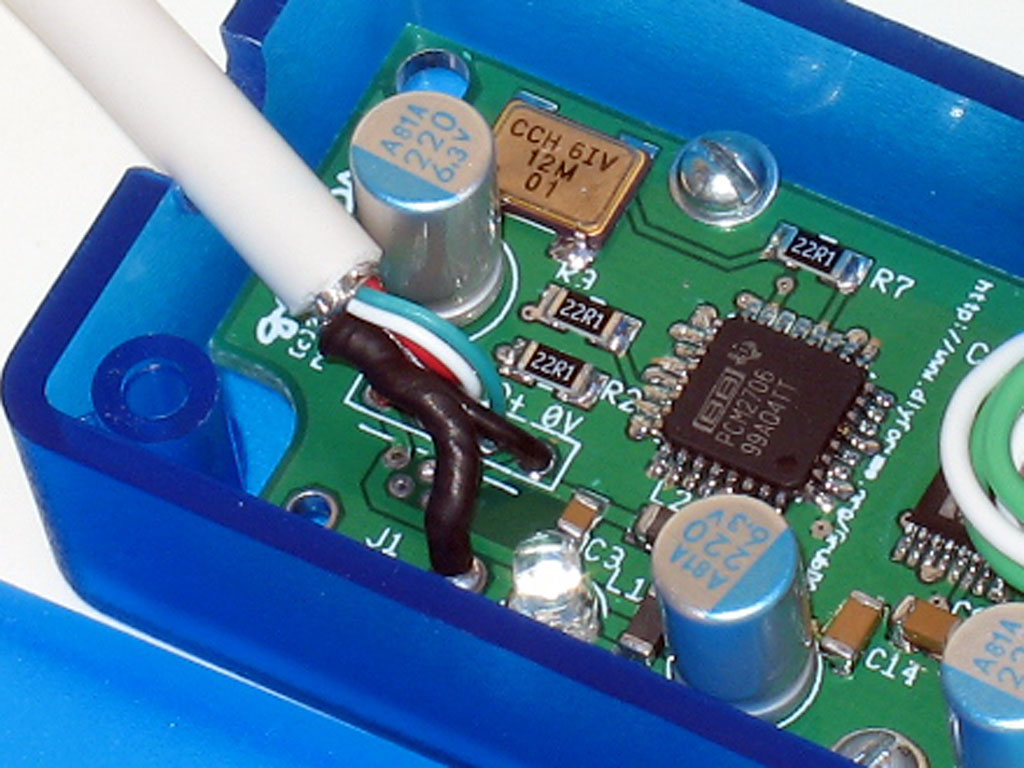
Here's the GrubDAC layout showing the actual wiring connections for the USB cable - in line from left to right, Red, White, Green, and Black at the 5V, D-, D+, and 0V (GND) positions respectively - plus the drain wire connection to be soldered into one of the mini-connector spring tab holes. Again, these connections and colors are a world-wide standard:
|
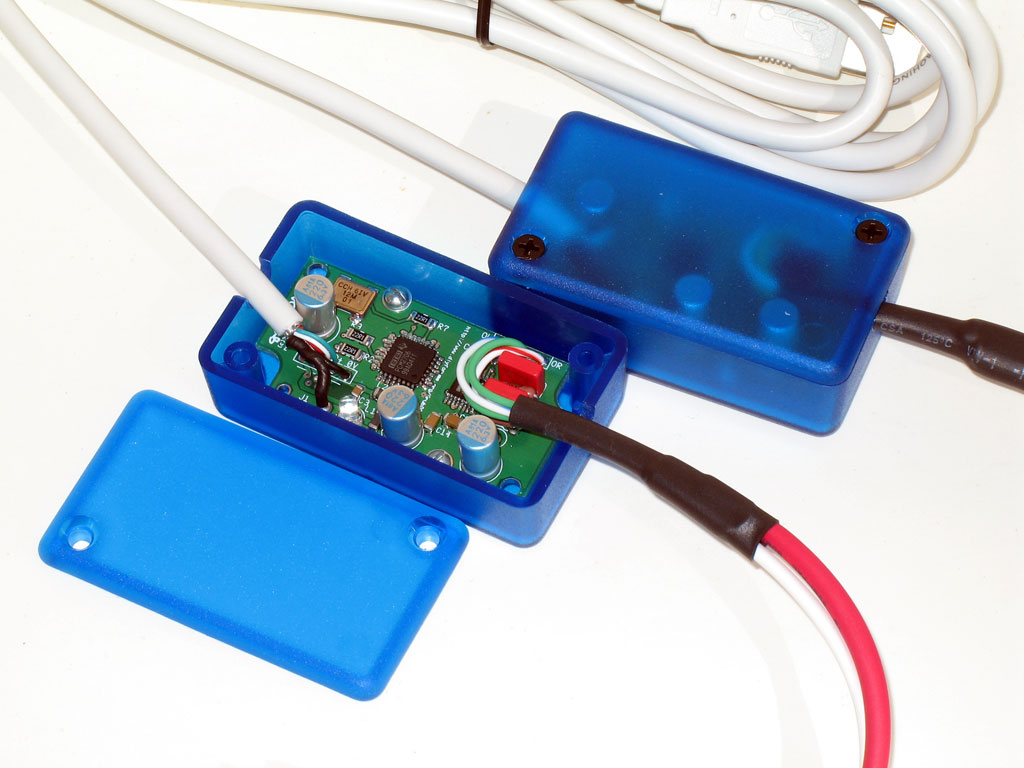
| The USB cable and RCA outputs assembly are easy as pie - simply lay them in the channels you've cut or grinded in the case ends while you attach the grubDAC PCB to the molded case bosses in the case bottom. Depending on clearances, you may want to use a small cable tie on the inside of the USB cable and/or the RCA outputs for strain reliefs. |
| Since the Hammond case is translucent, the LED shows through without drilling an outside hole in the case! |

|
Here's the bottom of the case on one grubDAC next to a completely assembled one. It illustrates the cable connections and their placement in the small channels on the ends. Note the two small screws that are used to attach the PCB to the case bottom. The USB cable is Molex #88728-3400. Be sure to choose a full-rated USB cable, not a sub-channel version. Sub-channel USB cables may not be shielded and will not support even the full USB-1 specification. Because the GrubDAC and GrubCableDAC are USB-powered, the quality of the cable is important: performance is sensitive to interference. |
The pigtail cable datasheet: Molex #88728-3400
As mentioned, it is important that you select a full-rated shielded high-speed USB cable (as above). For reference, here's an excerpt from "Chapter 4 - Physical Environment, Cables" from the book USB System Architecture, by Don Anderson - USB Cable Spec
|

|
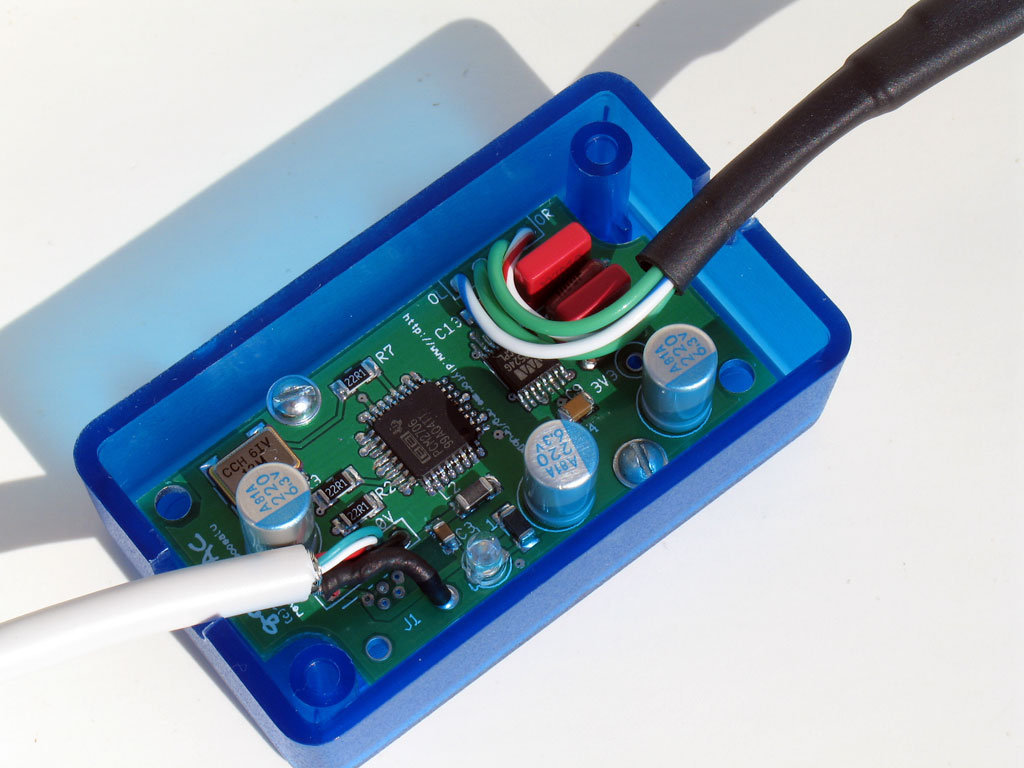
A closeup shows the cable routing and connections. Also note the two small screws that are used to attach the PCB to the Hammond case bottom using the molded-in bosses in the Hammond case. The grubDAC PCB has been specifically designed and shaped to fit the Hammond 1551HTBU case and it's mounting bosses. |

|
In this photo, you can see the connections to the USB pads. In order from left to right - Red, White, Green, and Black from the USB pigtail, and the outside shield (drain wire) soldered to one of the mini-connector spring tab holes.
|
|
|